
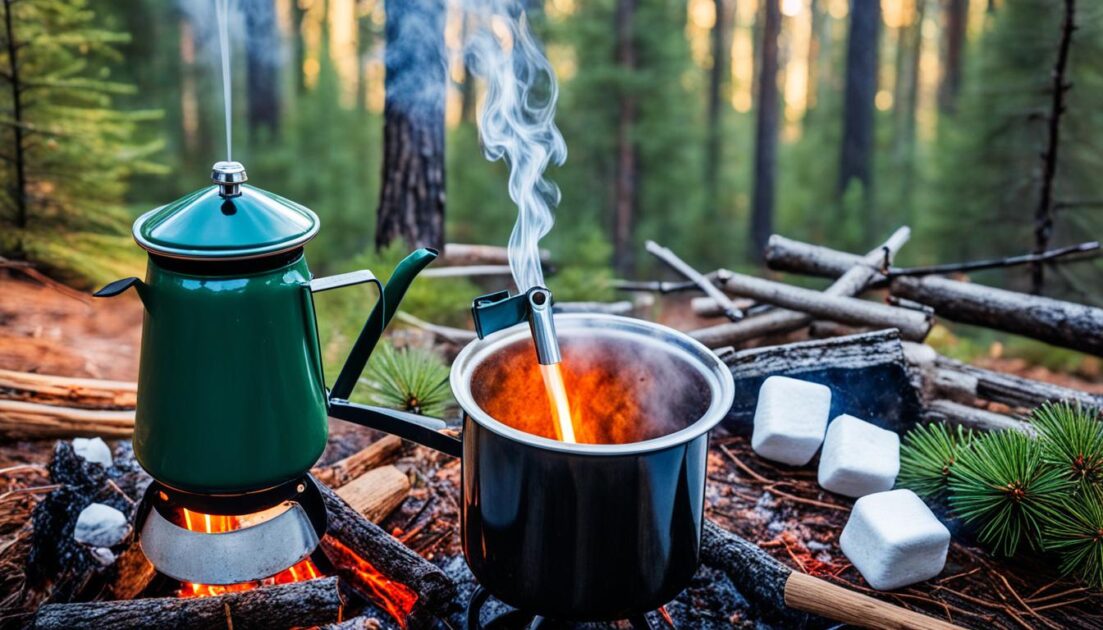
Welcome to my guide on how to brew the perfect cup of campfire coffee using a camping percolator. Whether you’re deep in the wilderness or enjoying a backyard camping experience, percolating coffee is a tried-and-true method that guarantees a rich and aromatic brew. With the right equipment and technique, you can easily satisfy your caffeine cravings and elevate your camping adventures.
Key Takeaways:
- Percolating coffee while camping is a classic brewing method for achieving a flavorful cup.
- A camping percolator is essential for brewing coffee outdoors, along with coarse ground coffee, water, and a heat source.
- Using a camping percolator is simple once you grasp the process, and some tips can help you perfect your brew.
- Choosing the best camping percolator requires considering factors such as size, durability, and brewing capacity.
- Recommended camping percolator options include brands like Coleman, GSI Outdoors, and Stanley.
What You’ll Need
To percolate coffee while camping, you’ll need a few essential items. First and foremost, you’ll need a camping percolator. There are many options available on the market, so it’s important to choose one that suits your needs in terms of size, durability, and brewing capacity.
Additionally, you’ll need coarse ground coffee, water, and a heat source such as a camping stove or campfire. Optional items that can enhance your brewing experience include coffee filter paper, a timer, a measuring scale, and potholders for handling the hot percolator.
Investing in the right camping coffee equipment is crucial for a satisfying brew. The best percolator for camping will be durable, compact, and capable of withstanding the rugged outdoor environment. Look for features like heat-resistant handles for safe handling, a removable basket for easy cleaning, and a sturdy construction that can withstand the demands of camping.
Recommended Camping Percolators
| Percolator | Features | Price |
|---|---|---|
| GSI Outdoors Enamelware Percolator | Durable enamel construction, heat-resistant handle, easy-pour spout | $ |
| Coleman Stainless Steel Percolator | Stainless steel material, large capacity, easy to clean | $$ |
| Stanley Adventure All-in-One Boil + Brew French Press | French press and percolator in one, insulated design, built-in nesting cups | $$$ |
These are just a few examples of the best percolators for camping. Consider your personal preferences and camping needs when choosing the perfect one for you. Remember, investing in high-quality camping coffee equipment will ensure that you enjoy delicious, freshly brewed coffee during your outdoor adventures.

How to Use a Camping Percolator
Using a camping percolator is a straightforward process that allows you to enjoy a delicious cup of coffee while camping. Follow these step-by-step instructions to master the art of percolator coffee brewing:
- Step 1: Start by assembling the necessary equipment. You will need a camping percolator, coarse ground coffee, water, and a heat source such as a camping stove or campfire.
- Step 2: Measure the perfect amount of water for your desired number of cups and pour it into the percolator. Avoid exceeding the percolator’s maximum fill line to prevent overflow during the brewing process.
- Step 3: Insert the percolator basket, which holds the coffee grounds, into the percolator.
- Step 4: Add the desired amount of coarse ground coffee to the percolator basket. A general guideline is to use one tablespoon of coffee grounds per 6 ounces of water for a strong brew.
- Step 5: Securely attach the percolator lid, ensuring a tight seal. This helps to maintain the proper brewing temperature and prevent any coffee grounds from escaping.
- Step 6: Place the percolator on the heat source, whether it’s a camp stove or campfire. Adjust the heat to achieve a gentle simmer rather than a rolling boil.
- Step 7: Allow the coffee to percolate for about 7-10 minutes. The percolator works by boiling the water, which then rises through a tube and filters through the coffee grounds, extracting flavor and aroma.
- Step 8: After the desired brewing time, remove the percolator from the heat source and carefully pour the brewed coffee into cups or a carafe. Take caution as the percolator will be hot.
- Step 9: Serve and enjoy your freshly brewed percolator coffee!
If you prefer a stronger brew, you can adjust the brewing time to your liking. Experiment with different coffee-to-water ratios and brewing times until you find the perfect balance that suits your taste. With a camping percolator, you can easily elevate your camping coffee experience and savor the rich flavors of freshly brewed coffee amidst the great outdoors.

8 Tips On Using a Camping Percolator
If you’re planning on brewing coffee while camping, using a camping percolator is a great choice. Here are 8 tips to help you make the most out of your camping coffee experience:
- Choose the right grind: Opt for a coarse grind when using a camping percolator. This ensures that the grounds don’t pass through the percolator basket and end up in your cup of coffee.
- Measure your coffee: Use the right coffee-to-water ratio to achieve the perfect strength. A good rule of thumb is two tablespoons of coffee for every six ounces of water.
- Preheat your water: Start with hot water for faster percolation and optimal extraction. This will help to avoid over-extraction and bitterness in your coffee.
- Monitor the percolation process: Keep an eye on the percolator’s bubble rate to determine the optimal brewing time. Adjust the heat source accordingly to maintain a steady bubble rate.
- Use potholders or oven mitts: The percolator can become extremely hot during the brewing process, so make sure to use potholders or oven mitts when handling it to prevent burns.
- Don’t overfill the percolator: To prevent overflow and messy cleanup, avoid overfilling the percolator with water and coffee grounds. Stick to the manufacturer’s recommended capacity.
- Keep it clean: Regularly clean and maintain your camping percolator to ensure the best-tasting coffee. Follow the manufacturer’s instructions for cleaning and storing.
- Experiment and enjoy: Campfire coffee is all about embracing the adventure. Feel free to adjust the variables, such as coffee strength and brewing time, to suit your personal preferences and explore new flavors.
By following these tips, you’ll be able to enjoy a delicious cup of campfire coffee using your trusty camping percolator. Remember, the joy of camping coffee lies in the simplicity and connection to nature, so savor every sip.
Which is the Best Camping Percolator to Use?
When it comes to brewing coffee while camping, having the best camping percolator can make all the difference. Here are some highly recommended options that combine durability, functionality, and ease of use:
1. Stanley Adventure Percolator: With its classic design and rugged stainless steel construction, the Stanley Adventure Percolator is built to withstand the demands of outdoor adventures. It features a large capacity, easy-pour spout, and a sturdy handle for convenient handling.
2. GSI Outdoors Enamelware Percolator: The GSI Outdoors Enamelware Percolator combines retro style with modern performance. Made from durable enamel-coated steel, it is lightweight and has a heat-resistant handle. Its unique features include a heat-resistant silicone grip and a transparent knob that allows you to monitor the brewing process.
3. Coleman Enamelware Percolator: The Coleman Enamelware Percolator is another excellent choice for camping coffee enthusiasts. Made from heavy-duty enamel-coated steel, it is designed to withstand outdoor conditions. It features a large capacity, easy-grip handle, and a tight-fitting lid to prevent spills and keep your coffee hot.
Remember, the best percolator for camping is the one that suits your specific needs and preferences. Whether you prioritize durability, capacity, or style, these recommended options are sure to enhance your camping coffee experience.
FAQ
How do I percolate coffee while camping?
Percolating coffee while camping is easy with the right equipment and technique. You’ll need a camping percolator, coarse ground coffee, water, and a heat source. Simply follow the step-by-step guide provided earlier in the article for brewing instructions.
What equipment do I need for camping coffee?
To make coffee while camping, you’ll need a camping percolator, coarse ground coffee, water, and a heat source such as a camping stove or campfire. Optional items that can enhance your brewing experience include coffee filter paper, a timer, a measuring scale, and potholders for handling the hot percolator.
How do I use a camping percolator?
Using a camping percolator is simple. Fill the percolator’s base with water and add the required amount of coarse ground coffee to the basket. Place the basket and stem into the percolator and assemble the lid securely. Place the percolator on a heat source and allow the water to boil. Once the coffee reaches the desired strength, remove the percolator from the heat source and serve.
What are some tips for using a camping percolator?
Here are eight tips for using a camping percolator:
1. Use the recommended amount of coffee per cup.
2. Grind your coffee beans to a coarse consistency.
3. Experiment with the brewing time to achieve your preferred strength.
4. Avoid overfilling the percolator to prevent a bitter taste.
5. Use fresh and cold water for brewing.
6. Avoid stirring the coffee during brewing to prevent grounds from getting into the brewed coffee.
7. Clean and dry your percolator thoroughly after each use.
8. Practice and adjust your brewing technique based on personal preference.
Which is the best camping percolator to use?
There are several top contenders for the best camping percolator on the market. Some recommended options include the Coleman Enamelware Percolator, GSI Outdoors Enamelware Percolator, and Farberware Classic Stainless Steel Yosemite Percolator. Consider factors such as size, durability, brewing capacity, and personal preferences when selecting the best percolator for your camping needs.