
To have a safe and enjoyable hiking experience at Mount Rainier, it is essential to know the top trails and have the necessary knowledge about the park. This article will provide you with a comprehensive guide on Mount Rainier hiking, including information about easy and hard hiking trails, hiking in different seasons, historical significance, geological wonders, wildlife, scenic viewpoints, trip planning, safety, and nearby camping options.
Key Takeaways:
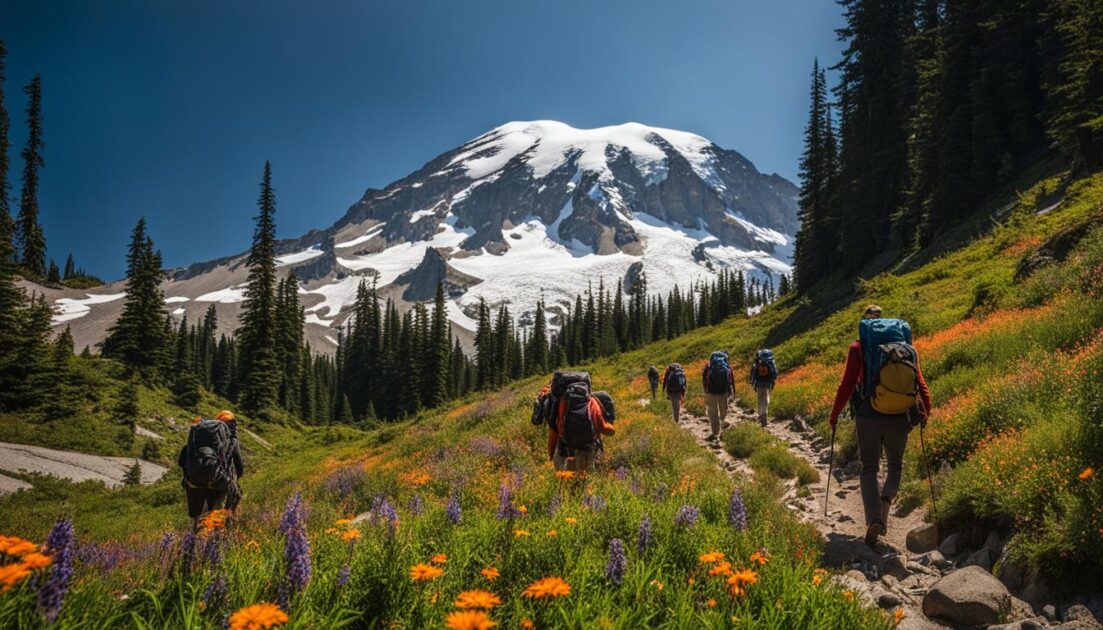
- Explore the top hiking trails at Mount Rainier National Park
- Plan your hikes according to the season and weather conditions
- Learn about the historical and geological significance of the park
- Stay safe by following hiking safety guidelines and carrying the Ten Essentials
- Discover nearby camping options for a complete outdoor adventure
Understanding the Ten Essentials for Hiking
When embarking on a hiking adventure, it’s crucial to be well-prepared and equipped with the Ten Essentials. These essential items will ensure your safety and comfort throughout the hike, regardless of its difficulty or the season. Let’s take a closer look at each of the Ten Essentials:
- Hiking Gear: It is essential to have appropriate hiking gear, including sturdy hiking boots, comfortable clothing, and a backpack to carry your essentials.
- Navigation Tools: Carry a map, a compass, and a GPS device to help you navigate and stay on the right track during your hike.
- Sun Protection: Protect yourself from harmful UV rays by wearing sunscreen, sunglasses, and a hat.
- Insulation: Be prepared for changing weather conditions by carrying extra clothing layers to keep you warm and dry.
- Illumination: A reliable source of light, such as a headlamp or flashlight, is crucial for navigating in low-light conditions or emergencies.
- First Aid Supplies: Always have a first aid kit with essential supplies to treat injuries and manage medical emergencies.
- Fire-Starting Tools: Carry matches or a fire starter to help you build a fire for warmth, cooking, or signaling for help.
- Repair Kit: A repair kit with basic tools and materials, such as duct tape, can come in handy for fixing gear or improvised shelters.
- Nutrition: Pack enough food to keep you energized throughout the hike. Choose lightweight, high-energy snacks and meals.
- Hydration: Stay hydrated by carrying a hydration system, such as a hydration pack or water bottles, and use water treatment methods to ensure safe drinking water.
- Emergency Shelter: Carry lightweight emergency shelter options, such as a tarp or emergency blanket, to protect yourself from the elements in case of unexpected situations or overnight stays.
By ensuring you have all these Ten Essentials before your hike, you’ll be well-prepared to face any challenges that may arise. Remember, safety should always be a priority, and having the right gear and knowledge will enhance your hiking experience.
| Essential Items | Importance |
|---|---|
| Hiking Gear | Ensures comfort and safety on the trail |
| Navigation Tools | Helps you stay on track and find your way |
| Sun Protection | Prevents sunburn and protects your skin from UV rays |
| Insulation | Keeps you warm and dry in changing weather conditions |
| Illumination | Provides light in low-light conditions or emergencies |
| First Aid Supplies | Allows you to treat injuries and manage medical emergencies |
| Fire-Starting Tools | Enables you to build a fire for various purposes |
| Repair Kit | Helps you fix gear or improvised shelters |
| Nutrition | Provides energy for the hike |
| Hydration | Ensures you stay hydrated during the hike |
| Emergency Shelter | Provides protection from the elements in emergencies |
Navigating the Mountains: Using Maps, Compass, and GPS

When it comes to hiking in the mountains, having the right navigation tools is essential for a safe and successful journey. While GPS devices have become popular among hikers, it is still important to know how to read maps and use a compass. Technology can sometimes be unreliable, especially in remote areas with poor signal reception, so having traditional navigation skills is crucial.
As a hiker, I always make sure to carry a map, compass, and a GPS device as backup. These tools provide multiple ways to navigate through the mountains and ensure that I stay on the right path. Maps give me a broader overview of the area, helping me identify landmarks and plan my route. A compass, on the other hand, allows me to determine my direction and navigate accurately even when the visibility is limited or the terrain is challenging.
While GPS devices provide real-time positioning and tracking, they can drain battery quickly and may not always have updated maps. That’s why I never rely solely on GPS and always carry a map and compass as my primary navigation tools. They have proven to be reliable and have helped me navigate through unfamiliar terrains and find my way back when needed.
Table: Pros and Cons of Navigation Tools
| Navigation Tools | Pros | Cons |
|---|---|---|
| Maps |
|
|
| Compass |
|
|
| GPS |
|
|
Being proficient in using navigation tools is a valuable skill for any hiker. It gives me confidence in my ability to navigate through the mountains safely and efficiently. Before heading out on a hike, I always make sure to familiarize myself with the map, plan my route, and have a backup plan in case of any unexpected circumstances. By using a combination of maps, compass, and GPS, I can confidently explore new trails and enjoy the stunning beauty of the mountains without worrying about getting lost.
Sun Protection: Shielding Yourself from Harmful UV Rays

When embarking on a hiking adventure in Mount Rainier, it is crucial to prioritize your sun protection. The sun’s harmful UV rays can cause sunburns and long-term skin damage, even on cloudy days. To safeguard your skin, remember to apply sunscreen regularly to all exposed areas of your body.
In addition to sunscreen, don’t forget to protect your eyes and face by wearing sunglasses and hats. These accessories provide an extra layer of defense against the harsh sun rays, reducing the risk of eye strain and sunburns on your face and scalp.
Choosing the Right Sunscreen
Not all sunscreens are created equal, so it’s essential to select one that suits your needs. Look for a broad-spectrum sunscreen with an SPF (Sun Protection Factor) of 30 or higher. This will protect your skin from both UVA and UVB rays. Water-resistant sunscreens are also recommended, especially if you anticipate perspiring or encountering rain during your hike.
| Sunscreen SPF | Recommended Usage |
|---|---|
| SPF 30 | Everyday outdoor activities |
| SPF 50+ | Extended sun exposure or high-altitude hiking |
Remember to reapply sunscreen every two hours or more frequently if you’re sweating heavily. Pay attention to commonly missed areas such as the ears, neck, and back of the hands. With proper sun protection, you can enjoy your Mount Rainier hiking experience while keeping your skin healthy and radiant.
Layer Up: Insulation for Changing Weather Conditions

When hiking in Mount Rainier, it’s crucial to be prepared for the unpredictable weather conditions. The mountain’s weather can change rapidly, and having proper insulation is essential to protect yourself from the elements. In this section, I will discuss the importance of insulation and provide recommendations on the best gear to keep you warm and comfortable during your hike.
Carrying extra clothing is key when it comes to insulation. Layering your clothing allows you to adjust your warmth level as needed. Start with a moisture-wicking base layer to keep sweat away from your skin. Follow that with an insulating layer, such as a fleece or down jacket, to trap heat. Finally, add a waterproof and windproof outer layer, like a shell jacket, to protect you from rain, snow, and strong winds. This layering system ensures that you stay dry and warm, no matter the weather conditions.
When choosing insulation gear, opt for materials like wool or synthetic fibers. These materials retain warmth even when wet, unlike cotton which absorbs moisture and can make you feel colder. A wool hat and gloves are essential to keep your extremities warm, as they tend to lose heat quickly. Additionally, wearing wool or synthetic socks will help prevent blisters and keep your feet comfortable throughout the hike.
To protect yourself from rain and wet conditions, it is important to carry proper rain gear. A waterproof jacket and pants will keep you dry, allowing you to continue your hike even in wet weather. Remember, staying dry is crucial to prevent hypothermia and maintain your body temperature.
Gear Recommendations:
- Base Layer: Moisture-wicking t-shirt and leggings
- Insulating Layer: Fleece or down jacket
- Outer Layer: Waterproof and windproof shell jacket and pants
- Wool hat and gloves
- Wool or synthetic socks
By properly layering your clothing and choosing the right insulation gear, you can stay warm and comfortable during your hike in Mount Rainier. Remember to always check the weather forecast before heading out, as conditions can change rapidly. Stay prepared and enjoy the breathtaking beauty of Mount Rainier while keeping yourself safe.
Illuminate Your Path: Headlamps and Flashlights

When embarking on a hiking adventure, it’s important to be prepared for low-light conditions, especially during early morning or late evening hikes. To ensure you have a reliable source of illumination, I recommend carrying a headlamp or flashlight. These handy tools will not only help you navigate through the trails but also provide peace of mind in case of emergencies.
Headlamps are a popular choice among hikers due to their hands-free functionality. They typically come with adjustable straps that allow you to comfortably wear them on your head, ensuring your hands are free to tackle various terrains. Flashlights, on the other hand, offer a more traditional handheld option.
It’s essential to bring extra batteries or bulbs for your headlamp or flashlight to avoid being left in the dark. These spare parts will keep you prepared and ensure your light source remains reliable throughout your entire hiking journey.
Comparison of Headlamps and Flashlights
| Headlamp | Flashlight |
|---|---|
| Hands-free functionality | Handheld option |
| Adjustable straps for secure fit | Easier to gripe in challenging terrain |
| Lightweight and compact | Can provide a more concentrated beam |
| Usually offers multiple light settings (low, medium, high) | May have longer battery life |
Both headlamps and flashlights have their advantages, and the choice ultimately depends on personal preference and hiking conditions. It’s always a good idea to carry a backup light source, whether it’s a headlamp or flashlight, in case one fails or gets misplaced.
Remember, maintaining proper illumination during your hikes not only enhances your safety but also allows you to fully appreciate the beauty of your surroundings. So, be sure to pack a reliable headlamp or flashlight, along with extra batteries or bulbs, and venture into the great outdoors with confidence.
Stay Prepared: First Aid Supplies for Hiking Emergencies
When heading out on a hiking adventure, it’s crucial to be prepared for any unforeseen emergencies or injuries that may occur along the way. Carrying a well-stocked first aid kit can make all the difference in providing immediate care and ensuring a safe and successful hiking trip. Here are some essential first aid supplies to include in your kit:
First Aid Kit Essentials
1. Bandages and wound dressings: Pack a variety of adhesive bandages, gauze pads, and adhesive tape to treat cuts, blisters, and other wounds.
2. Antiseptic wipes and ointments: These can help clean and disinfect wounds to prevent infection.
3. Pain relief medication: Include over-the-counter pain relievers such as ibuprofen or acetaminophen to manage pain and reduce inflammation.
4. Tweezers and scissors: These can come in handy for removing splinters, cutting tape or bandages, and other tasks requiring precision.
5. Emergency medications: If you have any known allergies or medical conditions, carry your prescribed medications along with a written list of your current medications and medical history.
6. Instant cold packs: These can provide relief for sprains, strains, and other injuries by reducing swelling and numbing the area.
“Being prepared with first aid supplies can help you effectively respond to minor injuries and stabilize more serious conditions until professional medical help is available.”
Recognizing and Treating Hiking Injuries
While prevention is key, injuries can still occur while hiking. Here are some common hiking injuries to be aware of and how to manage them:
- Sprains and strains: Rest, elevate, and apply cold compresses to the affected area. If pain persists or the injury is severe, seek medical attention.
- Blisters: Clean and disinfect the area, apply a blister bandage or moleskin, and avoid popping the blister to prevent infection.
- Heat exhaustion: Move to a cool, shaded area, remove excess clothing, and drink plenty of fluids. If symptoms worsen or heatstroke is suspected, seek immediate medical attention.
- Hypothermia: Gradually warm the person by removing wet clothing, providing dry layers and blankets, and seeking shelter. If the individual’s condition deteriorates, call for emergency assistance.
Fire Safety: Carrying the Tools for Building a Fire

When venturing into the great outdoors, it’s essential to be prepared for any situation, including the need to build a fire. Whether you’re looking to stay warm, cook a meal, or signal for help, having the right tools is crucial for fire safety. Here are the essential items you should carry:
- Fire Starter: A reliable fire starter is a must-have. It can be as simple as waterproof matches or a more advanced fire starter tool that produces sparks even in wet conditions. Choose the option that works best for you and ensure it’s stored in a waterproof container.
- Matches: In addition to a fire starter, carrying extra matches is always a good idea. Opt for waterproof matches that can withstand moisture and comes in a compact, airtight container. Be sure to keep them in a safe, dry place within your backpack.
- Repair Kit: While a repair kit may not seem directly related to fire safety, it can come in handy when building a fire. Duct tape, included in most repair kits, can be used to fix broken equipment or secure kindling. Additionally, having small tools like a knife or multi-tool can help in gathering firewood.
Remember, fire safety is of utmost importance when building a fire. Always ensure you have permission to build a fire in the area you’re hiking, follow any fire regulations or restrictions, and choose a safe location for your fire away from dry vegetation or flammable materials.
By carrying these essential tools and practicing responsible fire safety, you can enjoy the benefits of having a fire while minimizing the risks associated with open flames. Remember to always extinguish your fire completely before leaving the area to prevent accidental wildfires.
Fire Safety Tips:
- Clear the area around your fire pit of any dry leaves, branches, or flammable objects.
- Ensure there’s a sufficient supply of water nearby to extinguish the fire if needed.
- Never leave your fire unattended and always fully extinguish it before leaving.
- Avoid building fires on windy days to prevent spreading embers.
| Items to Carry | Description |
|---|---|
| Fire Starter | A reliable tool for starting a fire, such as waterproof matches or a fire starter that produces sparks even in wet conditions. |
| Matches | Extra matches in a waterproof container to ensure a backup ignition source. |
| Repair Kit | Includes duct tape and small tools like a knife or multi-tool, which can be useful for gathering firewood and securing kindling. |
Nutrition and Hydration on the Trails

When embarking on a hiking adventure in Mount Rainier, it is crucial to prioritize proper nutrition and hydration. The strenuous nature of hiking, combined with varying weather conditions, can quickly deplete your energy levels and lead to dehydration. To ensure a successful and enjoyable hiking experience, it is essential to fuel your body adequately and stay hydrated throughout the journey.
Extra food is a must-have item in your backpack. Choose lightweight and nutrient-dense options that provide a balanced mix of fat, fiber, protein, and sugar. Snacks like trail mix, energy bars, and dried fruits are easy to carry and provide a quick boost of energy. Don’t forget to pack enough food to sustain you throughout the entire hike, including any potential delays or emergencies.
Hydration is equally important. Invest in a reliable hydration system, such as a hydration pack or water bottles, to ensure easy access to water while on the trails. Mount Rainier offers several natural water sources, but it is crucial to treat the water before consumption. Carry a water treatment method, such as water purification tablets or a lightweight water filter, to eliminate any potential contaminants and ensure safe drinking water.
By prioritizing your nutrition and hydration needs, you’ll be able to maintain your energy levels, prevent fatigue, and stay well-hydrated throughout your Mount Rainier hiking adventure.
Shelter from the Elements: Emergency Shelter Options

When venturing into the unpredictable wilderness of Mount Rainier, it’s essential to be prepared for unexpected situations or overnight stays. Carrying emergency shelter options is crucial for ensuring your safety and well-being in the face of adverse weather conditions. Here are some reliable and lightweight options to consider:
- Tarps: These versatile and durable sheets of waterproof material can be easily set up to create a makeshift shelter. They provide protection from rain, wind, and sun, making them an excellent emergency shelter option.
- Emergency Blankets: Also known as space blankets, these lightweight and compact blankets are designed to reflect and retain body heat. They are highly effective in preventing hypothermia and can be a lifesaver in cold weather conditions.
- Ponchos: A poncho is not only a rain protection garment but also a valuable emergency shelter option. It can be used as a rain cover or be transformed into a basic shelter by tying it between trees or using trekking poles.
Remember, the key to effectively using these emergency shelter options is practice. Familiarize yourself with setting up the tarps and ponchos before your hike, and ensure they are easily accessible in your backpack. Additionally, always check the condition of your emergency blankets and replace them if damaged or expired.
“In the wilderness, having an emergency shelter can mean the difference between life and death. Always carry a lightweight and reliable shelter option to protect yourself from the elements.” – Outdoor Enthusiast
By being proactive and prepared with the right emergency shelter options, you can confidently embark on your Mount Rainier hiking adventure, knowing that you have the means to protect yourself from unforeseen circumstances. Remember, nature can be unpredictable, so it’s essential to prioritize your safety and well-being throughout your journey.
Conclusion
After exploring the magnificent hiking trails and scenic viewpoints of Mount Rainier, it is important to prioritize safety. As a seasoned hiker, I highly recommend following these essential tips and carrying the necessary gear to ensure a safe and enjoyable experience in this majestic national park.
Remember to plan ahead and familiarize yourself with the top Mount Rainier trails and hiking guide. This knowledge will help you navigate the park more effectively and make the most of your adventure. Additionally, always prioritize hiking safety by carrying the Ten Essentials, including navigation tools, sun protection, insulation, illumination, first aid supplies, fire-starting tools, repair kit, nutrition, hydration, and emergency shelter.
By respecting the natural environment and adhering to these safety guidelines, you can fully immerse yourself in the beauty of Mount Rainier while minimizing any potential risks. So, gear up, lace your boots, and embark on an unforgettable hiking experience in one of America’s most breathtaking national parks!
FAQ
What essential items should I carry while hiking at Mount Rainier?
The Ten Essentials include navigation tools, sun protection, insulation, illumination, first aid supplies, fire-starting tools, repair kit, nutrition, hydration, and emergency shelter.
Why is it important to know how to read maps and use a compass?
While GPS devices are available, they can be unreliable in certain situations. It is essential to have traditional navigation skills as a backup. Carry a map, compass, and GPS device and ensure you have the necessary skills to navigate through the mountains.
How can I protect myself from the sun while hiking at Mount Rainier?
Regularly apply sunscreen, even on cloudy days. Wear sunglasses and hats for additional protection from the sun’s harmful UV rays.
What should I wear to stay insulated in changing weather conditions?
Carry extra clothing like gloves, a wool hat, socks, and a wind shell. Avoid wearing cotton as it retains moisture and increases the risk of hypothermia. Opt for wool or synthetic materials instead. Also, carry rain gear to stay dry during rainy conditions.
Why is illumination important for hiking?
Having a reliable source of illumination is crucial, especially during early morning or late evening hikes. Carry a headlamp or flashlight, along with extra batteries and bulbs, to navigate through trails in low-light conditions and emergencies.
What should I include in my first aid kit for hiking?
Carry supplies for treating common hiking injuries like blisters, sprained ankles, and abrasions. Also, be aware of the signs and symptoms of heat exhaustion and hypothermia. A comprehensive first aid kit can help manage these emergencies until professional help is available.
What tools should I carry for building a fire?
Carry matches or a fire starter in a waterproof container. Additionally, having a repair kit that includes duct tape and tools can be useful for various situations, including fire building.
How can I ensure proper nutrition and hydration while hiking at Mount Rainier?
Carry extra food that provides a balance of fat, fiber, protein, and sugar. Use a hydration system, such as a hydration pack or water bottles, and employ water treatment methods to ensure safe drinking water.
What are the emergency shelter options I should consider while hiking?
Lightweight options like tarps, emergency blankets, or ponchos can provide protection from the elements and help maintain body heat in emergencies.
How can I have a safe and enjoyable hiking experience at Mount Rainier?
Plan ahead, stay prepared by following the essential hiking tips, carry the necessary gear, and respect the natural environment while exploring Mount Rainier.